
Investing in a retractable shading system is an exceptional way to expand your outdoor living space and naturally cool your home. However, many homeowners begin browsing fabric swatches long before evaluating the structural realities of their exterior walls. A standard wall installation is often considered the default configuration, but structural limitations frequently force a pivot. Low eave heights, obstruction from gutters, architectural protrusions, or a lack of accessible internal framing can make standard wall mounting impossible.
When facing these architectural hurdles, a roof mount retractable awning serves as the premier engineering solution. By utilizing heavy-duty awning installation brackets designed to anchor directly into the structural roof rafters, installers can bypass wall constraints completely. This structural guide provides an in-depth, technical comparison between roof mounting and wall mounting configurations, helping you determine the ideal structural anchor point to secure a safe, stable, and high-clearance patio shade system.
Architectural Challenges and the Need for High Clearance Patio Shade
The primary catalyst for choosing between a roof mount or a wall mount configuration comes down to physical clearance. To ensure a retractable shading system remains functional and structurally sound, it must maintain specific height requirements.
Understanding Pitch Droop and Headroom Calculations
When a retractable shade system extends, the lateral arms do not remain perfectly horizontal. To properly shed light debris and morning dew, the fabric must slope downward. Most systems require a minimum factory-preset pitch angle of 15 degrees, which translates to a drop of roughly 3 inches for every foot of system projection.
If you install a system with a 12-foot projection, the front lead bar will hang roughly 3 feet lower than the mounting brightness level at the back anchor wall. If the mounting surface is only bolted at an 8-foot height constraint on a standard single-story wall, the front lead bar will drop down to an unusable 5 feet of clearance. This creates an immediate safety hazard and chokes out your outdoor living comfort.
Overcoming Wall Obstructions and Gutter Intrusions
Beyond sheer vertical math, standard wall placements face an array of structural roadblocks:
- Soffit and Eave Protrusions: Deep architectural roof overhangs block the upward vertical space needed to mount a clean casing.
- Gutter Lines: Exterior drainage troughs often sit exactly where a wall-mounted bracket needs to reside. Trying to mount directly below a gutter line can squeeze your vertical headroom down to unworkable levels.
- Exterior Fixtures: Sconces, downspouts, HVAC intake vents, and decorative window molding regularly split up the clear, continuous horizontal wall space needed to mount a solid structural torsion bar.
Wall Mount Structural Engineering and Constraints
A wall mount configuration fastens the awning assembly directly to the vertical exterior face of your home. While straightforward in concept, executing it safely requires absolute structural precision.
Finding and Securing Structural Wall Studs
A common mistake in DIY circles is assuming that exterior siding or plywood sheathing is strong enough to support a heavy shading system. It is not. A premium retractable system can easily weigh between 150 to 350 pounds depending on its overall width, motor configurations, and frame thickness. When that system extends completely, it acts as a massive lever, exerting tremendous rotational leverage (torque) on the mounting surface.
To resist this pulling force, installers must use rugged lag screws to bypass cosmetic materials like vinyl siding, stucco, or fiber-cement boards. The hardware must bite deep into the center of your home’s internal structural framing—either the solid double top plate of the wall framing or the individual vertical wall studs.
Material-Specific Wall Engineering
Different exterior finishes require specialized installation techniques to prevent structural rot and framing damage over time:
- Stucco Walls: Because stucco is brittle and easily cracks under pressure, installers must use specialized spacers to bridge the gap between the internal wooden studs and the exterior bracket. This prevents the bracket from crushing the cosmetic stucco finish when tightened down.
- Brick and Masonry Facades: Fastening into brick requires anchoring directly into the solid structural brick units using heavy-duty masonry sleeve anchors or chemical epoxy systems. Mounting brackets should never be fastened into soft, crumbling mortar joints, as they will pull free under load.
- Wood Siding: Wood offers a clean mounting path, but structural backing plates must be introduced if the structural studs do not align precisely with the factory-designated bracket spacing on the structural torsion bar.
Roof Mount Structural Engineering and Advanced Bracket Architecture
When your home’s exterior walls cannot provide the necessary height, a roof mount retractable awning bypasses the wall entirely by climbing onto the roof structure. This method elevates the mounting baseline, providing the vital vertical clearance required for low clearance patio shade applications.
Heavy-Duty Structural Roof Rafter Brackets
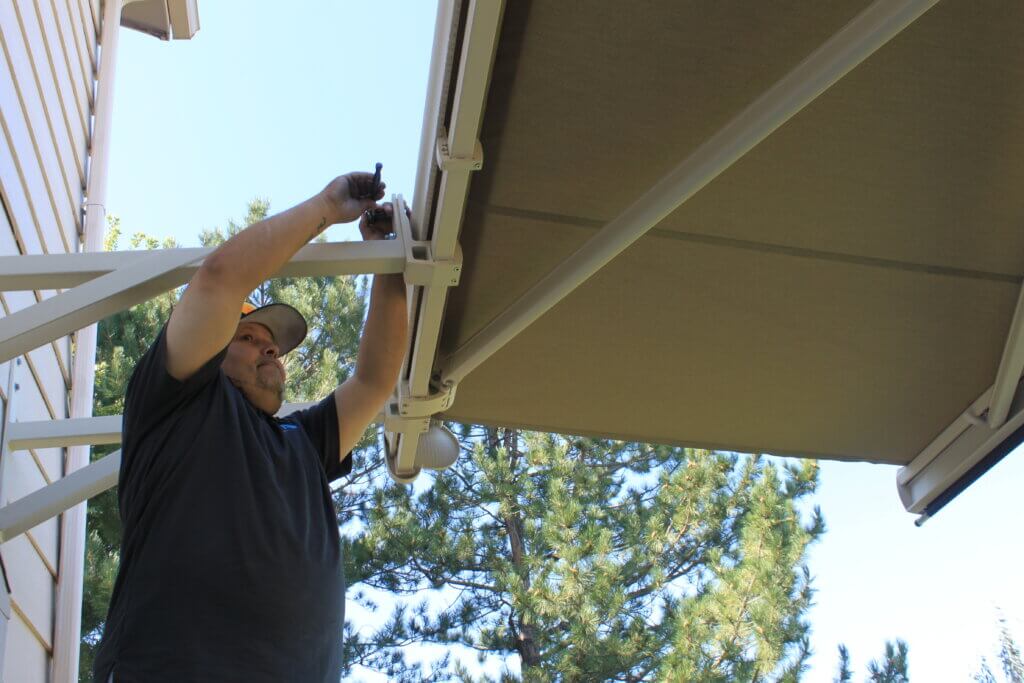
A roof installation relies entirely on specialized, heavy-duty awning installation brackets. These components are typically engineered from high-grade, powder-coated structural steel or structural architectural aluminum to withstand extreme shear forces and wind lift.
Unlike flat wall brackets, roof brackets feature a contour-engineered base plate that spans across the roof deck to anchor directly into the structural roof rafters or manufactured roof trusses. The bracket body then sweeps up and over the gutter line, projecting outward to provide a plumb, vertical mounting face where the main casing can safely rest.
The Waterproofing Process and Leak Prevention
The single biggest concern homeowners have regarding roof placement is the potential for leaks. Because a roof installation requires driving lag bolts directly through the roof deck, choosing a premier full-service provider with certified installation crews is paramount.
To maintain an absolute, leak-free seal, installers execute a comprehensive waterproofing protocol:
- Locating Rafters Non-Destructively: Installers accurately pinpoint the exact center of the structural roof rafters beneath the deck from the exterior.
- Applying Base Sealants: High-grade, polyether-based marine or industrial construction sealants are injected directly into the pilot holes and generously coated along the underside of the bracket footings.
- Integrating Metal Flashings: Specially shaped metal roof flashing plates slide underneath the uphill shingles and layer directly over the bracket base, working seamlessly with your roof’s natural water-shedding design.
- Final Cap Sealing: Every exposed bolt head and structural joint receives a protective layer of UV-stabilized self-leveling sealant, creating an impenetrable barrier against standing water and melting snow.
Direct Engineering Comparison | Roof Mount vs Wall Mount
| Technical Metric | Wall Mount Shading Configuration | Roof Mount Shading Configuration |
| Primary Structural Anchor | Vertical wall studs or double top plates | Structural roof rafters or engineered trusses |
| Headroom and Vertical Clearance | Limited by wall height and gutter lines | Maximized by elevating above the roof line |
| Wind Resistance and Torque | Transfers load horizontally into wall framing | Transfers load downward/diagonally into roof rafters |
| Waterproofing Complexity | Low; requires standard silicone caulking around plates | High; requires code-compliant flashing and polyether sealants |
| Installation Hardware | Standard heavy lag bolts and flat wall plates | Specialized structural steel riser brackets and flashing |
| Ideal Architectural Matching | Multi-story homes with high framing lines | Single-story homes, split-levels, and low eaves |
Wind Performance, Dynamic Forces, and Structural Loads
Every retractable awning behaves like a sail when the wind kicks up. Whether you are installing a manual or motorized system, understanding how wind forces interact with your home’s framing is key to long-term safety.
Vertical Updrafts and Downdrafts
When wind rolls off a patio or moves down from a hillside, it slams underneath the extended fabric canopy, creating a massive pocket of upward pressure (uplift). Conversely, sudden downbursts push the fabric downward.
- Wall Mount Force Distribution: A wall mount setup experiences these forces as severe tension and compression loads. The top bolts are constantly pulled outward away from the wall, while the lower lip of the bracket is forced inward against your home’s siding.
- Roof Mount Force Distribution: A roof mount system handles these loads beautifully. Because the brackets sit flat on top of the sloping roof deck, downward forces are distributed as compressive loads across the thick framing rafters. To counteract high wind uplift, the heavy-duty structural steel brackets are engineered to resist flexing, preventing the awning from twisting or warping your structural rafter tails.
To add an extra layer of structural defense against sudden gusts, homeowners often integrate automated safety additions. Discover how advanced sensors can save your investment by reading our guide on automatic wind sensors for retractable awnings.
Selecting the Right Shading Architecture for Your Property
Choosing between these two installation options is never a matter of personal whim; it is dictated completely by the specific architectural parameters of your home.
When to Select a Wall Mount Configuration
A wall-anchored system is the optimal configuration if your home satisfies the following conditions:
- You have a multi-story home or a high single-story wall providing at least 8.5 to 9 feet of open vertical space above the patio deck.
- The exterior wall is free of window trim, structural downspouts, decorative masonry corbels, or exterior lighting lines.
- Your patio area features a raised deck or balcony that minimizes the required drop length of the awning frame.
- You want to explore comprehensive seasonal maintenance tips for your system; see our practical guide detailing seasonal awning care steps.
When to Select a Roof Mount Configuration
A roof-anchored setup is the clear engineering winner if your home features these characteristics:
- You are trying to shade a patio attached to a low-eaved single-story ranch home, a manufactured home, or a split-level floor plan.
- The vertical wall clearance beneath your fascia board or gutter line drops anywhere below 8 feet.
- Your home features large sliding glass doors that extend almost entirely to the top ceiling plates, leaving zero wall space for structural brackets.
- You want to explore tailored shading options built for your local area; learn more about our specialized custom options for Denver retractable awnings.
Professional Installation and the Direct Awnings Solution
Attempting to mount a massive structural shading asset without specialized training can quickly lead to costly home damage, compromised roofs, or structural failures. This is a task that demands professional expertise and precision equipment.
At Direct Awnings, we specialize in solving complex structural challenges. Our installation technicians evaluate your home’s specific needs to determine the safest, most efficient anchoring path. Whether your home calls for standard wall fastening or custom-flashed roof mounts, we handle the entire project from initial design to the final bolt.
Are you ready to transform your patio into a cool, shade-protected oasis? Schedule an appointment with Direct Awnings today to arrange your on-site design consultation and structural evaluation.